- The hook must be shaped properly. The shank of the hook must be curved, and the gape of the hook opened up to give the hook an exaggerated hump. This hump helps give the fly its action while being stripped forward through the water.
- The body shape must have the wide part on the forward end of the fly. This gives the fly an area distribution that makes it innately unstable as it moves through the water, which adds to the wobble effect.
- The fly needs bead chain eyes to make the fly sink at a fairly level front-to-back attitude, which helps achieve side-to-side wobble.
- I add a streamer tail to keep the body oriented properly while the fly sinks.
- Mustad 34007 hook, size 2
- Colored mylar or acetate body material. The material used for my redfish fly is called "Peach Rain". The only source that I know of for this material is Creative Feathers Fly Shop (website http://creativefeathers.com). A sheet of this material is only $1.20, and will easily make a couple of dozen flies.
- Clear acetate sheet material - like a page protector from Office Depot.
- Double-sided cellophane tape.
- OR - the easy way to make a body - order the body material precut from Creative Feathers Fly Shop. The precut bodies are already backed with the acetate material. All you have to do is lift it from the sheet and tie it on - no cutting required!
- Tail material. The tail on this fly is important. It assures that the fly settles with the hook pointed upward and the arch downward, which helps give it the desired action. You can pretty much use anything that you like. For the peach rain fly, I use a pink hackle tip, opal flashabou, shrimp crystal flash, and pink craft fur.
- Bead chain eyes
- Thread - I use Danville flat-waxed nylon in whatever color seems to work. I used pink for this example.
- Clear 5-minute epoxy. It is difficult to find 5-minute epoxy that is fairly colorless. Devcon 5-minute epoxy is the best that I have found thus far. I get it at WalMart for about $2.00 for one of the easy to use double-syringe dispensers like shown below.
- Sally Hansen's "Hard As Nails".
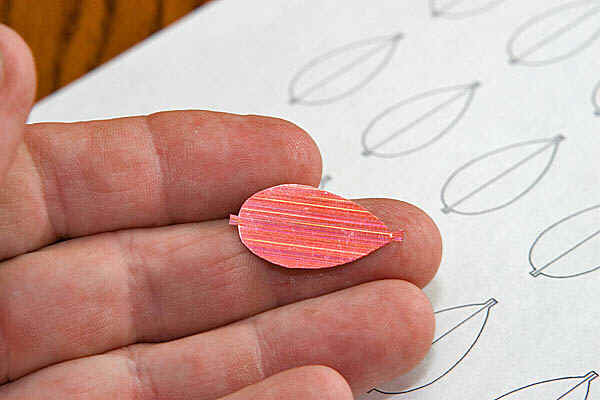
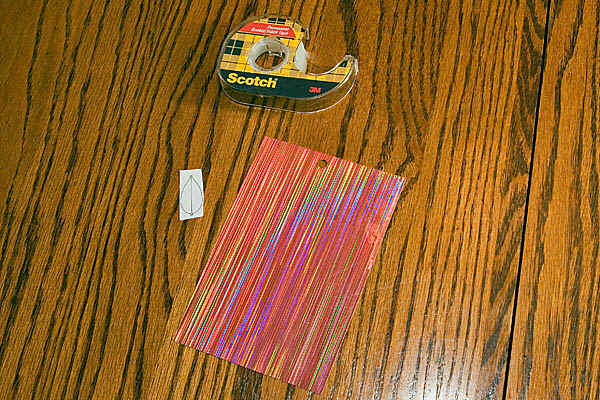 Cut one of the body
patterns from the page of patterns. Cut it rectangular, leaving space around the actual
body outline, as shown in this photo.
Cut one of the body
patterns from the page of patterns. Cut it rectangular, leaving space around the actual
body outline, as shown in this photo.
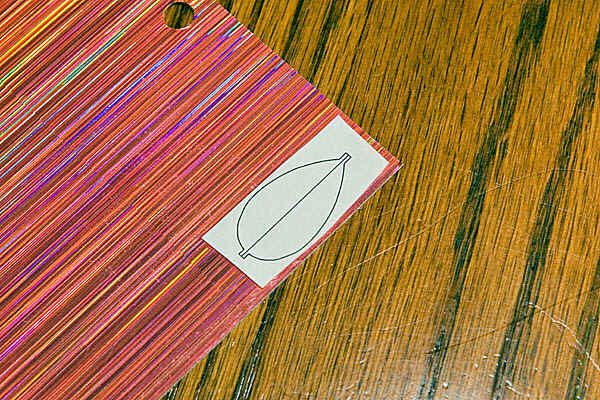 Using the
double-sided cellophane tape, attach the pattern to the sheet of body material.
Using the
double-sided cellophane tape, attach the pattern to the sheet of body material.
 Cut
out the body material around the outside of the pattern.
Cut
out the body material around the outside of the pattern.
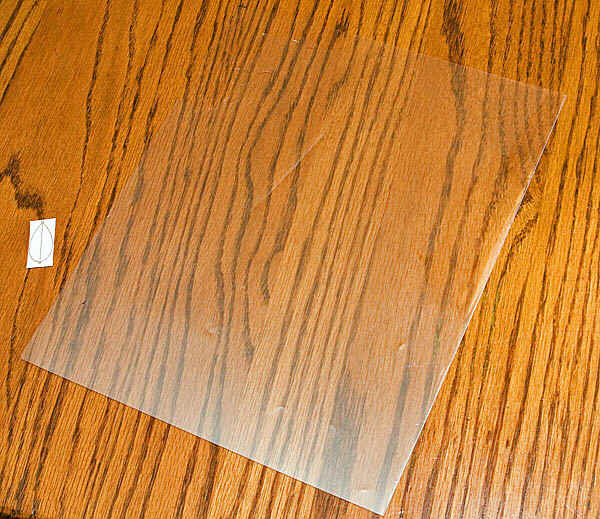
- Remove the backing from the body material that you just cut out and attach the pattern
to the clear acetate sheet material.
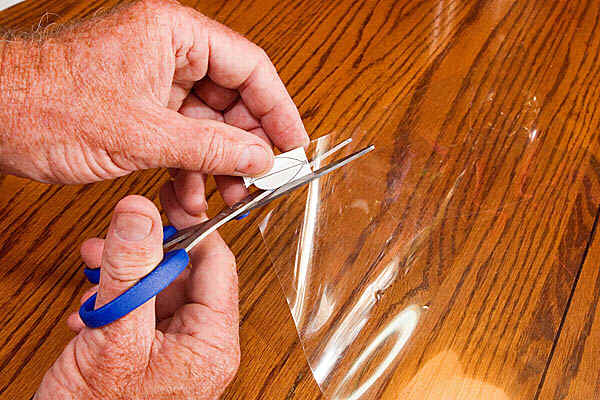 Cut the body from the
pattern. You are now cutting through the paper pattern, the body material, and the clear
acetate sheet.
Cut the body from the
pattern. You are now cutting through the paper pattern, the body material, and the clear
acetate sheet.
 Peel the paper pattern from
the body, leaving a body with the mylar material on top and and the clear acetate on
bottom.
Peel the paper pattern from
the body, leaving a body with the mylar material on top and and the clear acetate on
bottom.
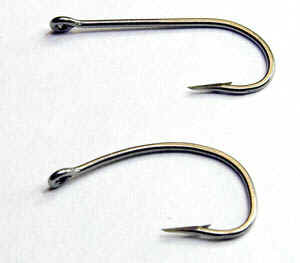
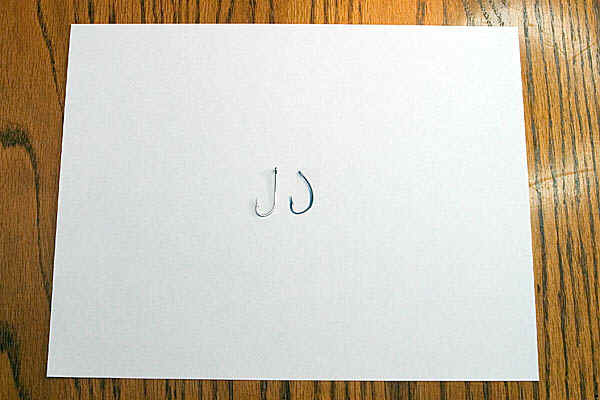 Using the printed hook
pattern, bend a hook to the proper shape. The gape of the hook must be opened and the
shank of the hook must.be curved to achieve the proper shape. The photo at right shows an
unbent hook laying on the printed hook pattern. The photo below shows an unbent hook and a
bent hook.
Using the printed hook
pattern, bend a hook to the proper shape. The gape of the hook must be opened and the
shank of the hook must.be curved to achieve the proper shape. The photo at right shows an
unbent hook laying on the printed hook pattern. The photo below shows an unbent hook and a
bent hook.
Here is a video of how to bend the hook:
- Mount the hook in your vise, with the jaws of the vise near the tip of the hook.
 Hold the body in place on top
of the hook with the front of the body approximately 1/8 inch behind the eye of the hook.
Using a felt-tip marker, mark the spot where the body ends in the curve of the hook.
Hold the body in place on top
of the hook with the front of the body approximately 1/8 inch behind the eye of the hook.
Using a felt-tip marker, mark the spot where the body ends in the curve of the hook.
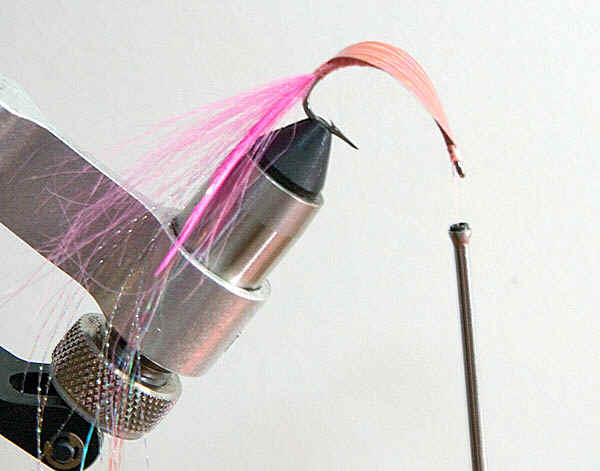
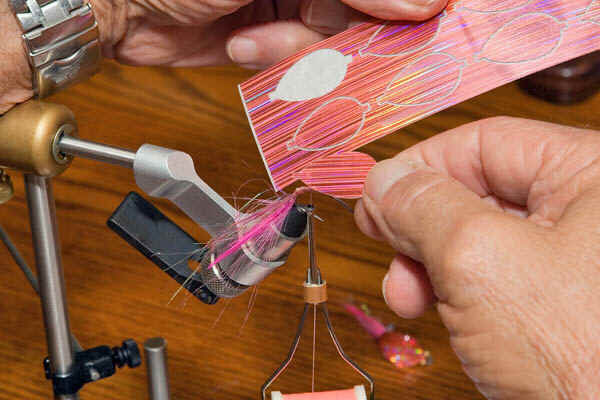
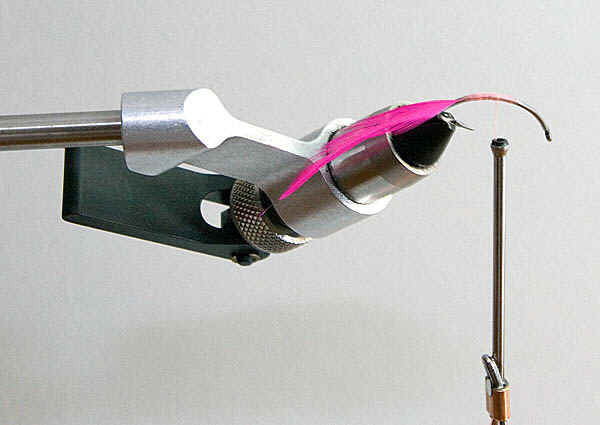 Prepare and tie in the
hackle tip, with the front of the hackle material at the mark in the curve of the hook.
Prepare and tie in the
hackle tip, with the front of the hackle material at the mark in the curve of the hook.
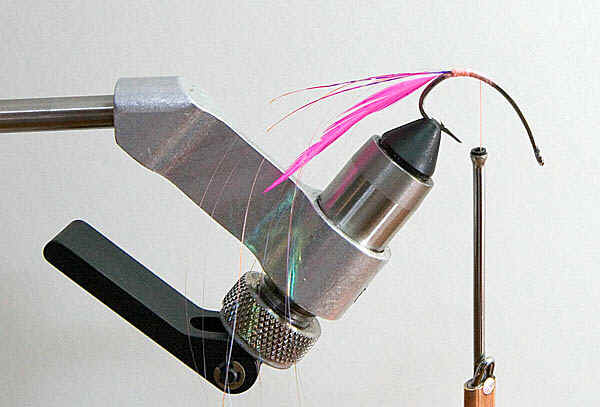 Tie in the flashabou. Not
much! Just enough for a little bit of flash.
Tie in the flashabou. Not
much! Just enough for a little bit of flash.
 Tie in the crystal flash.
Again - not much! Just enough for a little bit of flash.
Tie in the crystal flash.
Again - not much! Just enough for a little bit of flash.
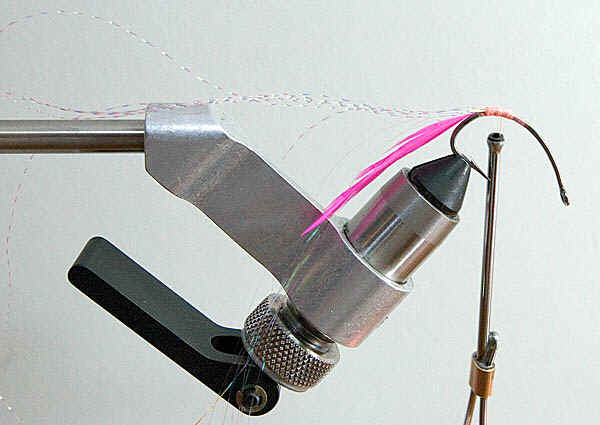
 Tie in the craft fur. And -
again - very sparse. While the tail is important, too much material in it is a bad thing.
Tie in the craft fur. And -
again - very sparse. While the tail is important, too much material in it is a bad thing.
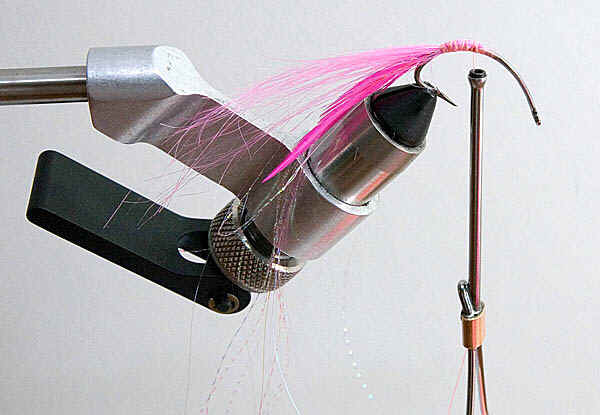
 Tie the rear end of the
body to the hook. Make sure that the front of the body will be approximately 1/8 inch
behind the eye of the hook so that there will be room for the bead chain eyes. Make sure
that the narrow end of the body is at the rear and the wide end at the front.
Tie the rear end of the
body to the hook. Make sure that the front of the body will be approximately 1/8 inch
behind the eye of the hook so that there will be room for the bead chain eyes. Make sure
that the narrow end of the body is at the rear and the wide end at the front.
 Advance the thread to the
front of the hook, covering the entire shank of the hook with thread and tie down the
front of the body. The body should be pulled down tight against the curved hook shank and
there should be ample room between the front of the body and the eye of the hook to tie
down the bead-chain eyes.
Advance the thread to the
front of the hook, covering the entire shank of the hook with thread and tie down the
front of the body. The body should be pulled down tight against the curved hook shank and
there should be ample room between the front of the body and the eye of the hook to tie
down the bead-chain eyes.
 Tie the eyes between the front of
the body and the eye of the hook, using a figure-eight wrap. Whip finish the thread behind
the bead-chain eyes and cut thread.
Tie the eyes between the front of
the body and the eye of the hook, using a figure-eight wrap. Whip finish the thread behind
the bead-chain eyes and cut thread.
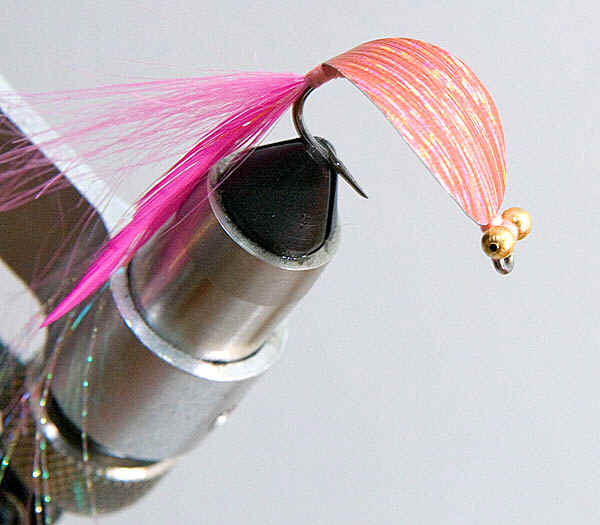
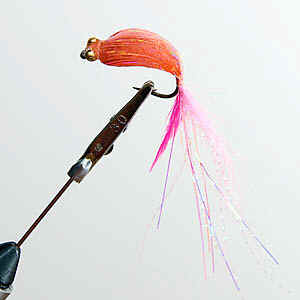
 Remove the fly from the
vise. It should look like this. Check to see that the body does not have any twist to it,
and that it and the eyes are straight and properly aligned on the hook shaft.
Remove the fly from the
vise. It should look like this. Check to see that the body does not have any twist to it,
and that it and the eyes are straight and properly aligned on the hook shaft.
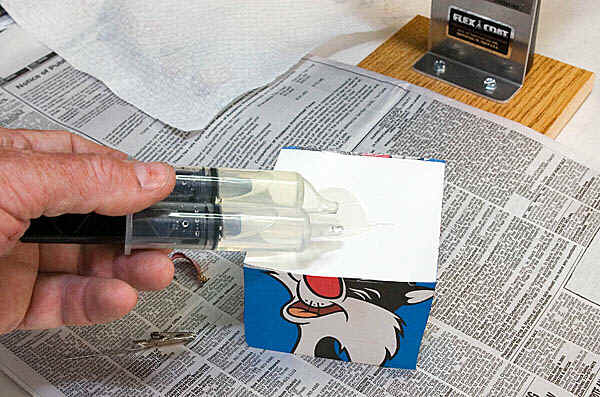 Mix 5-minute epoxy. It is
better to mix too much than not enough. I generally squeeze enough out from each side so
that the pool from each syringe is slightly larger the size of the fly body. I have also
found that a small pad of note paper is the easiest place to mix epoxy. When you are
finished, you simply tear off the sheet of paper and throw it away, leaving a new clean
surface.
Mix 5-minute epoxy. It is
better to mix too much than not enough. I generally squeeze enough out from each side so
that the pool from each syringe is slightly larger the size of the fly body. I have also
found that a small pad of note paper is the easiest place to mix epoxy. When you are
finished, you simply tear off the sheet of paper and throw it away, leaving a new clean
surface.
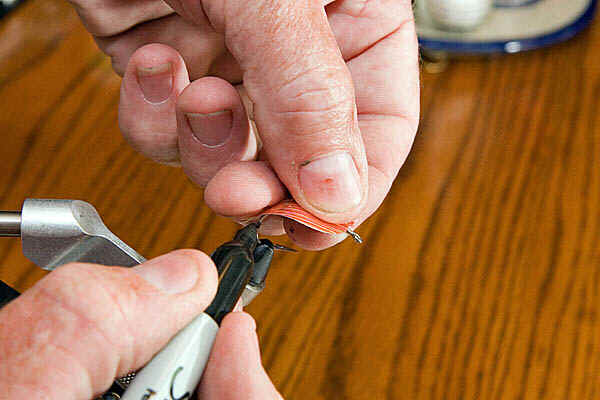
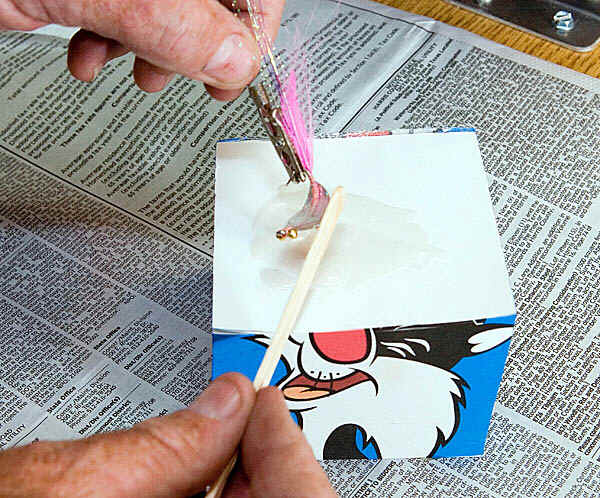 Holding the fly with an
alligator clip or other suitable holder, generously apply the epoxy to both the bottom and
top surface of the fly body. I use the same popsicle stick that I used for mixing the
epoxy to apply it to the fly. Rotate the fly around as you apply the epoxy so that the
epoxy is evenly distribute around the body of the fly. Try to get as much epoxy onto the
body as possible. Excess epoxy will pool around the body and will drop off. Hold the fly
over your epoxy mix while doing this so that the excess will drop back into your mix. Keep
reapplying epoxy from the mix until the body is well coated. Be careful to keep the tail
material above the fly body so that epoxy will not drip into the tail! Make sure that that
the body does not have any twist to it, and that it and the eyes are still straight and
properly aligned on the hook shaft.
Holding the fly with an
alligator clip or other suitable holder, generously apply the epoxy to both the bottom and
top surface of the fly body. I use the same popsicle stick that I used for mixing the
epoxy to apply it to the fly. Rotate the fly around as you apply the epoxy so that the
epoxy is evenly distribute around the body of the fly. Try to get as much epoxy onto the
body as possible. Excess epoxy will pool around the body and will drop off. Hold the fly
over your epoxy mix while doing this so that the excess will drop back into your mix. Keep
reapplying epoxy from the mix until the body is well coated. Be careful to keep the tail
material above the fly body so that epoxy will not drip into the tail! Make sure that that
the body does not have any twist to it, and that it and the eyes are still straight and
properly aligned on the hook shaft.
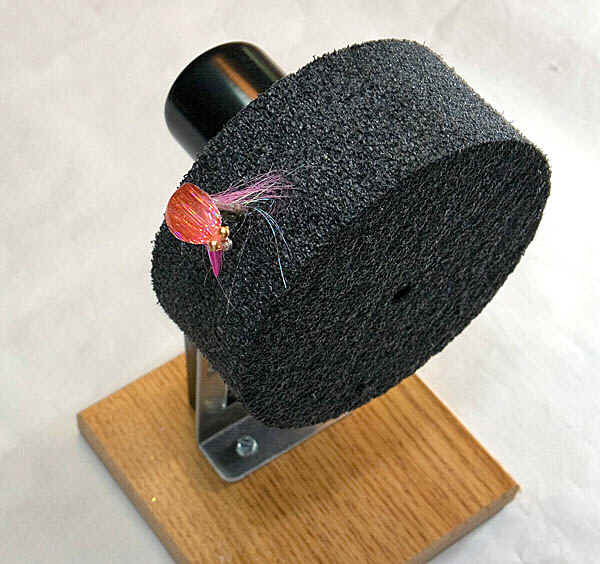 Place the fly on a drying
wheel and let it dry until the epoxy is hard and not tacky. If you do not have a drying
wheel, simply continue to rotate the fly around by hand until the epoxy has set and no
longer runs when you stop rotating it, then let it dry until the epoxy is hard.
Place the fly on a drying
wheel and let it dry until the epoxy is hard and not tacky. If you do not have a drying
wheel, simply continue to rotate the fly around by hand until the epoxy has set and no
longer runs when you stop rotating it, then let it dry until the epoxy is hard.
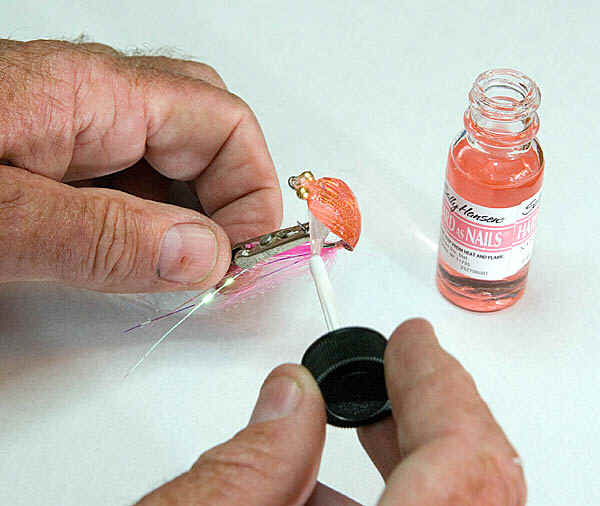 After the epoxy hardens,
remove the fly from the wheel. and coat the fly with Sally Hansen's "Hard As
Nails". This gives the fly a very high gloss finish and seals the edges of the fly.
While the epoxy is drying, it may retract from the edges of the fly in places, leaving
small uncovered areas. This coating will take care of that.
After the epoxy hardens,
remove the fly from the wheel. and coat the fly with Sally Hansen's "Hard As
Nails". This gives the fly a very high gloss finish and seals the edges of the fly.
While the epoxy is drying, it may retract from the edges of the fly in places, leaving
small uncovered areas. This coating will take care of that.
Tying an Epoxy Spoon Fly
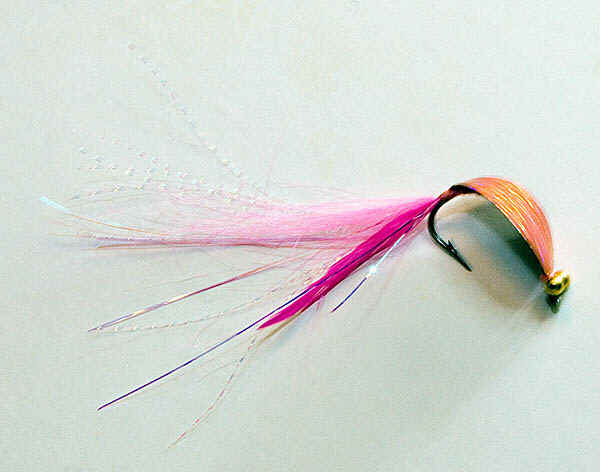
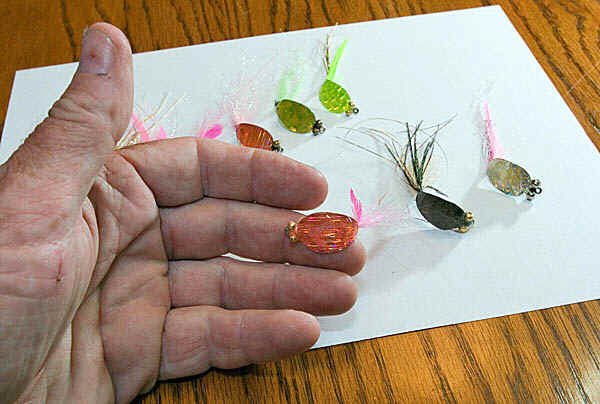
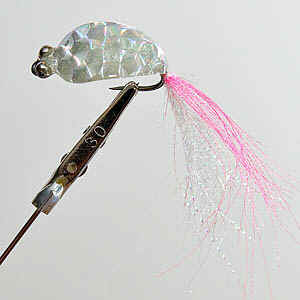
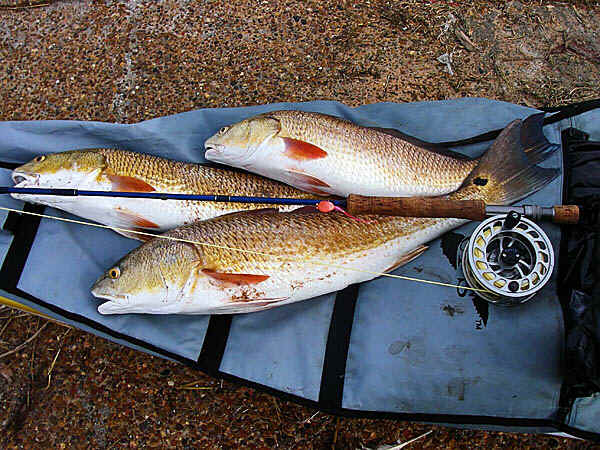 The epoxy spoon fly is an extremely effective
saltwater fly and is very easy to tie. I have tied dozens and dozens of them. My first
attempts looked great to me, but did the fish did not seem to care for them. After
consulting a good friend, I learned that the problem with my spoon flies was that they
lacked the action necessary to attract fish. My initial flies were fairly lifeless, and
merely slid through the water when I stripped them. The pattern shown below is a very
lively pattern. I have had very good success with this pattern, with numerous great days
without ever having to even change my fly. I caught this limit of redfish within the span
of 27 minutes with the fly shown in the picture. The instructions below are for that exact
fly.
The epoxy spoon fly is an extremely effective
saltwater fly and is very easy to tie. I have tied dozens and dozens of them. My first
attempts looked great to me, but did the fish did not seem to care for them. After
consulting a good friend, I learned that the problem with my spoon flies was that they
lacked the action necessary to attract fish. My initial flies were fairly lifeless, and
merely slid through the water when I stripped them. The pattern shown below is a very
lively pattern. I have had very good success with this pattern, with numerous great days
without ever having to even change my fly. I caught this limit of redfish within the span
of 27 minutes with the fly shown in the picture. The instructions below are for that exact
fly.
The proper action for this fly is for it to "wobble" its way through the water, both when sinking and when being stripped. While sinking, the fly should swing back and forth, side to side, like a falling leaf. This action sends waves through the water that fish sense, much like the waves of a swimming fish. This attracts feeding fish even if the water is not clear enough for them to see the fly. There are a few things that are I think are important for getting this action on the fly.
 The variations of color combinations is endless, and
a suitable colored fly can be created for almost any type of fish. The colors that I am
using in this example are for my "redfish special", which is currently my
favorite fly for redfish. There are two downloadable patterns that I am providing. The
first is the pattern for the spoon fly body, shown in this photo. Right-click
here to download this pattern and save this pattern as an Adobe PDF document (you need
Acrobat Reader to open it). After you download it, open and print it and you will have a
page of patterns for the body of this fly. If you have an image application that allows
you to print at selectable resolution, alternate GIF patterns are also here at 72dpi and
300dpi. Right-click here to download the 72dpi GIF. Save it,
then print it at 72dpi. If you want a higher-resolution pattern, then right-click here to download the 300dpi GIF, which is sized to
print at 300dpi.
The variations of color combinations is endless, and
a suitable colored fly can be created for almost any type of fish. The colors that I am
using in this example are for my "redfish special", which is currently my
favorite fly for redfish. There are two downloadable patterns that I am providing. The
first is the pattern for the spoon fly body, shown in this photo. Right-click
here to download this pattern and save this pattern as an Adobe PDF document (you need
Acrobat Reader to open it). After you download it, open and print it and you will have a
page of patterns for the body of this fly. If you have an image application that allows
you to print at selectable resolution, alternate GIF patterns are also here at 72dpi and
300dpi. Right-click here to download the 72dpi GIF. Save it,
then print it at 72dpi. If you want a higher-resolution pattern, then right-click here to download the 300dpi GIF, which is sized to
print at 300dpi.
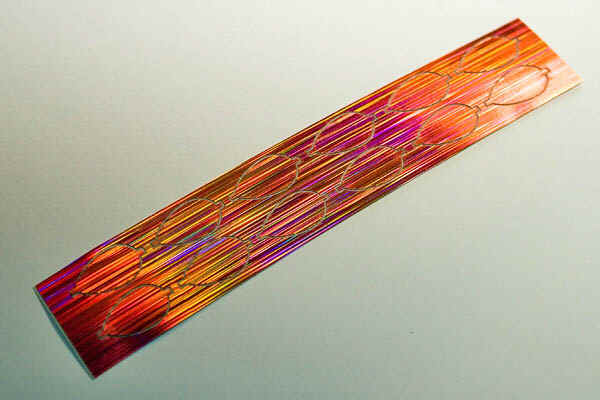 You can save yourself about half the time required to
make one of these spoon flies by beginning with a precut body from Creative Feathers Fly Shop. The precut bodies come
in a strip of 12 and are exactly the shape and size of this pattern.
You can save yourself about half the time required to
make one of these spoon flies by beginning with a precut body from Creative Feathers Fly Shop. The precut bodies come
in a strip of 12 and are exactly the shape and size of this pattern.
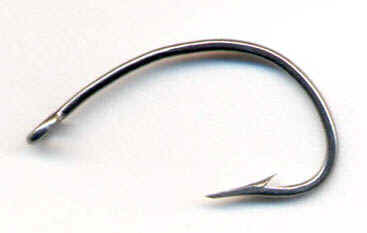 The second pattern is for
shaping the hook. Right-click here to download the PDF for this
pattern. Save it, then open and print it. Alternate JPG patterns are also available for
printing at 72dpi or 300dpi. Right-click here to download the
72dpi JPG pattern. Save it, then print it at 72dpi. If you want a higher-resolution hook
pattern, then right-click here to download the 300dpi JPG, which
is sized to print at 300dpi.
The second pattern is for
shaping the hook. Right-click here to download the PDF for this
pattern. Save it, then open and print it. Alternate JPG patterns are also available for
printing at 72dpi or 300dpi. Right-click here to download the
72dpi JPG pattern. Save it, then print it at 72dpi. If you want a higher-resolution hook
pattern, then right-click here to download the 300dpi JPG, which
is sized to print at 300dpi.
This fly is very easy to tie. It requires no difficult techniques. From start-to-finish
generally takes me about 15 minutes for one fly, including the epoxy coating.
Materials:
Instructions:
If you begin with a precut pattern, skip all the way down to step 7!
You are finished! Let the fly harden at least 24 hours before using it.
As I mentioned above, you can save a lot of time by using precut bodies from Creative Feathers Fly Shop. With a precut body, you simply lift the body from the strip and tie it to the hook. The precut bodies already have the acetate backing. These bodies are available in a wide variety of colors, including the "peach rain" that I am using here. Call Connie Mack Moran at Creative Feathers Fly Shop (phone 800-680-7733) and get going on those spoonflies!

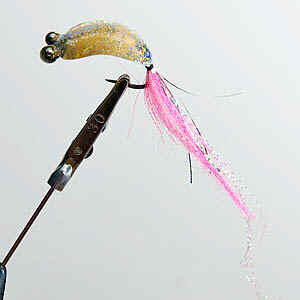
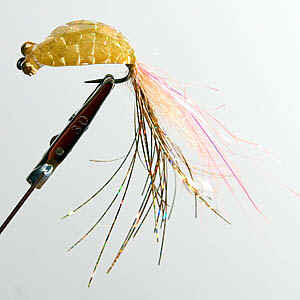
| Here are some color and material variations: | ||
 Peach rain redfish special |
 "Baby flounder" - black holo with peacock herl and gold holo flashabou |
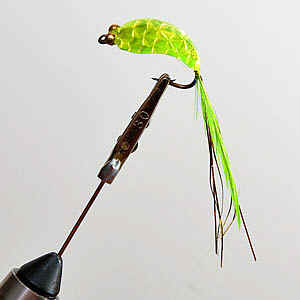 Chartreuse with peacock herl in tail |
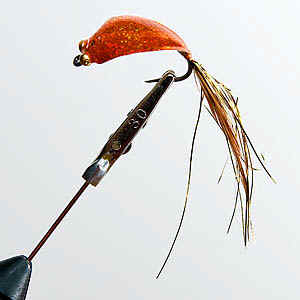 Orange sparkle |
 Orange sparkle, deer hair and copper crystal flash |
 Gold sparkle - glod holo with gold glitter |
 Gold |
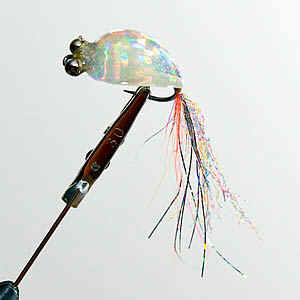 Silver |
 Silver |
Many thanks to Mr. Connie Mack Moran at Creative
Feathers Fly Shop for teaching me how to tie this fly, and for the many other valuable
lessons that he has taught me.
![]()

![]()
This page and the contents thereof are
the property of Walker Mangum
Copyright © 2002, 2006 by Walker Mangum
All rights reserved
Images on this page may not be reproduced without the express consent of Walker Mangum
You are welcome to create links to this page.